Your scale's readings are off, causing costly production errors. You need a reliable way to check its accuracy, but you are not sure where to start.
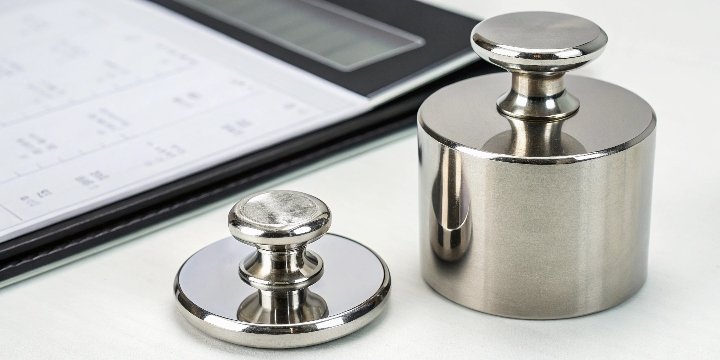
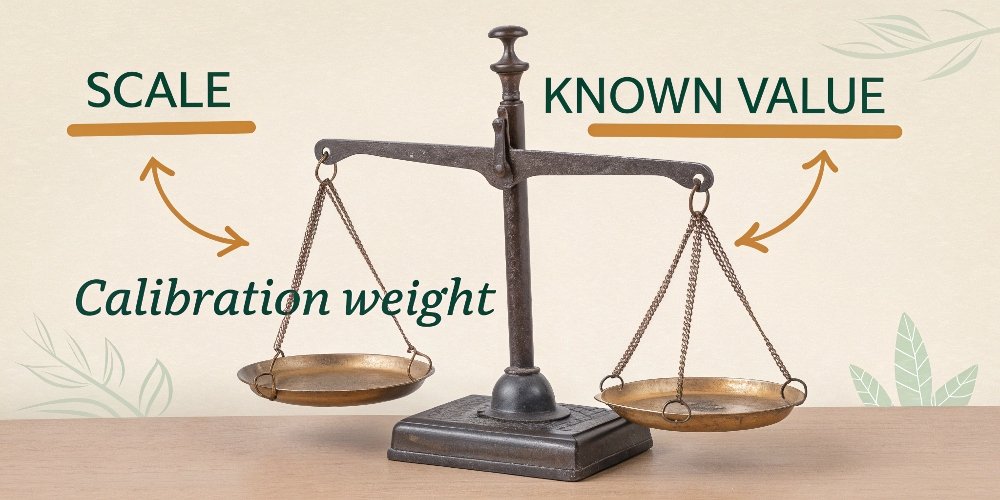
A calibration weight is a standard mass used to verify or adjust a weighing scale's accuracy. By placing a known, precise weight on the scale, you can check if it measures correctly and fix any errors, ensuring reliable results.

Now you know the basic definition. But what makes these simple objects so critical for industries that rely on precise measurements? It comes down to trust and traceability1. Let's dive deeper into why these weights are the gold standard for accuracy and how you can choose the right one for your specific needs. Understanding this is key to maintaining quality and efficiency.
What makes a calibration weight a reliable standard for scale accuracy?
Inaccurate measurements can ruin entire production runs. You need a benchmark you can trust completely. How can a simple piece of metal be that trusted benchmark?
Calibration weights are reliable because their mass is precisely controlled and traceable to international standards. Made from stable materials like stainless steel, they resist environmental changes, providing a consistent reference point for your scale's performance.

The reliability of a calibration weight2 comes from two main things: its material and its traceability. At Weigherps, we have seen how important both are over our 18 years of manufacturing.
Material Stability
The material used is extremely important. Most high-quality weights are made from specific grades of stainless steel3. This isn't just for looks. Stainless steel is dense, non-magnetic, and highly resistant to corrosion and oxidation. This means its mass will not change much over time due to rust or other environmental factors. Lower-grade weights might be made of cast iron4, which is cheaper but can rust easily if not cared for, changing its mass.
| Material | Pros | Cons |
|---|---|---|
| Stainless Steel | Highly stable, resists corrosion | More expensive |
| Cast Iron | Cost-effective for large weights | Prone to rust, less stable |
Traceability to a Standard
A weight is not reliable just because it is made well. It must also be traceable. This means its mass has been compared against a reference standard, which in turn was compared against a higher standard, all the way up to the International Prototype Kilogram (IPK) or its modern equivalent. This unbroken chain of comparisons is what gives you confidence that a 1 kg weight is truly 1 kg within a very small margin of error.
Why are specific certified weights necessary for calibrating sensitive scales?
Calibrating a laboratory balance with the wrong weight can invalidate research. You need absolute certainty for these high-precision tasks. Are all weights created equal for this job?
Certified weights are necessary because sensitive scales can detect tiny mass variations. A certificate guarantees the weight's exact mass and its uncertainty, proving it meets strict tolerance levels. This traceability is essential for quality control and scientific accuracy.

When you are dealing with analytical or laboratory balances, you are often measuring to the milligram or even microgram. At this level, tiny deviations matter a lot. A standard industrial weight is simply not good enough. This is where certification comes in.
A certified weight comes with a document, a calibration certificate5. This paper is not just a formality. It contains critical information.
Stated Value vs. True Mass
The certificate tells you the "true mass" of the weight, not just its nominal value. For example, a weight stamped "100 g" might actually have a true mass of 100.00012 g. For a sensitive balance, that difference is significant.
Measurement Uncertainty
The certificate also states the measurement uncertainty. This number tells you how confident the calibrating lab is in the true mass value. A smaller uncertainty means a more precise and reliable standard. This is crucial for industries where slight errors can have big consequences, such as pharmaceuticals or electronics manufacturing.
Without a certified weight, you are essentially guessing. You have no verified proof that your scale is accurate according to a recognized standard. For any quality management system like ISO 90016, using certified, traceable standards for calibration is not optional. It is a fundamental requirement.
How do different classes of calibration weights determine their level of precision?
You often see weights labeled E1, F1, or M1, but what do these labels mean? Choosing the wrong class could be an expensive mistake for your application.
Weight classes, like those from OIML, define the maximum permissible error, or tolerance. E1 weights have the tightest tolerance for high-precision lab balances. M-class weights have wider tolerances suitable for industrial scales.

The class of a weight is its grade of accuracy. International organizations like OIML7 (International Organization of Legal Metrology) set these standards. The classes help users match the right weight to the right scale. Using a weight that is too precise for your scale is a waste of money. Using one that is not precise enough makes your calibration useless.
Here is a simple breakdown of the common OIML classes we work with:
Understanding the Classes
- Class E1: The highest accuracy class. These are top-level reference standards used to calibrate other weights and are only used in highly controlled environments.
- Class E2: Used for calibrating high-precision analytical balances. They are also used to calibrate Class F1 weights.
- Class F1 & F2: These are for precision balances. They are very common in quality control labs, food testing, and pharmaceutical applications.
- Class M1, M2, & M3: These are industrial and commercial grade weights. They are used for calibrating industrial scales, platform scales, and retail scales. They are much more robust.
| Class | Typical Use Case | Tolerance Level |
|---|---|---|
| E1 | Calibrating other high-class weights | Extremely Low |
| E2 | Calibrating analytical balances (4-5 decimal places) | Very Low |
| F1 | Calibrating precision balances (2-3 decimal places) | Low |
| M1 | Calibrating industrial platform scales | Moderate |
Choosing the correct class is simple. As a rule of thumb, the weight's tolerance should be at least three times better than the readability of the scale you are calibrating.
What is the primary role of a mass standard in the calibration process?
You perform a calibration routine on your equipment, but what are you actually doing? The process seems simple, but its core purpose is often misunderstood.
The primary role of a mass standard, or calibration weight, is to act as a known "true" value. It provides a reference point to compare your scale's measurement against. This comparison reveals error, allowing for adjustment.

A mass standard, which is just another name for a calibration weight, is the heart of the calibration process. It turns an abstract concept—accuracy—into a simple, physical test. The entire process hinges on having a reliable, known quantity to use as a benchmark.
Let's break down the role of the mass standard into a clear sequence of events. When we provide custom weighing solutions, we always explain this process to our clients so they can maintain their equipment properly.
Step 1: Establish the "Known"
First, you select the appropriate mass standard. Its certified value is your "known" or "true" value. This is your point of reference.
Step 2: Perform the Measurement
Next, you place this mass standard on the scale you want to test. The scale will then display a reading. This is your "measured" value.
Step 3: Compare and Calculate
Now, you compare the measured value to the true value. The difference between them is the error. For example, if you place a 1000 g M1 weight on a scale and it reads 1001 g, the error is +1 g.
Step 4: Adjust if Necessary
Finally, you check if this error is within the acceptable tolerance for your process. If it is not, you use the scale's adjustment function to correct it, effectively teaching the scale what the true mass is. After adjustment, you test again to confirm it is now accurate.
The mass standard's role is simple but powerful. It provides an anchor to reality for your measuring instrument.
Conclusion
Calibration weights are fundamental for accurate measurements. Understanding their classes and certification ensures your scales are reliable, protecting your quality, compliance, and overall operational efficiency.
-
Understand the concept of traceability and its significance in ensuring measurement reliability. ↩
-
Explore this link to understand the importance of calibration weights in ensuring accurate measurements. ↩
-
Explore the advantages of stainless steel in manufacturing durable and reliable calibration weights. ↩
-
Learn why cast iron may not be the best choice for calibration weights and its impact on accuracy. ↩
-
Learn about the critical details found in calibration certificates and their significance. ↩
-
Explore how ISO 9001 standards impact calibration practices and quality management. ↩
-
Learn about OIML's role in establishing weight classes and their importance in calibration. ↩


[…] we always discuss the client's quality requirements. Many of them operate under standards like ISO 90011. A NIST traceable certificate is not a "nice-to-have" in these environments; it's a core […]
[…] Meets the strict requirements for quality systems like ISO 90016 and Good Manufacturing Practice […]
[…] You are responsible for all documentation and proving traceability1. […]
[…] The two most important organizations are the International Organization of Legal Metrology (OIML1) and, in the United States, the National Institute of Standards and Technology (NIST2). They […]