Problem: Inaccurate scales are costing you money. Agitation: Using unverified weights just makes everything worse. Solution: You need to understand how true precision is made.
Calibration weights are made by casting or machining high-density, stable materials like stainless steel or cast iron. They are then precisely adjusted, often by hand, and polished to meet strict international standards for mass and tolerance. This guarantees their accuracy and reliability for calibrating scales.

The process sounds straightforward, but the details are what create trust in a simple piece of metal. As a scale manufacturer, we don't produce these weights ourselves, but we use them every single day in our quality control department. We also work closely with specialized weight manufacturers. This experience has shown us that understanding how they're made is key to appreciating their value. It's the foundation of all accurate weighing. Let’s look closer at what these essential tools really are.
What are calibration weights?
Problem: You cannot fully trust your scale's readings. Agitation: This uncertainty can ruin production quality and lead to waste. Solution: Use calibration weights, the gold standard for accuracy.
Calibration weights are precision masses used to test and adjust the accuracy of weighing scales. A known, verified weight is placed on the scale, and the scale's reading is adjusted to match it. This ensures all your future measurements are reliable and correct.

Think of a calibration weight as a ruler for your scale. You wouldn't trust a ruler with misprinted markings, and you shouldn't trust a scale that hasn't been checked against a known, accurate mass. In my 19 years in the industrial scale business, I've seen how this simple concept forms the basis of quality control for countless industries. These weights are manufactured to conform to strict international standards, most commonly set by the OIML (International Organization of Legal Metrology)1. This organization defines different "classes" of weights, each with a specific tolerance for error.
Understanding OIML Classes
The class of a weight determines its accuracy. A higher-end scale, like one used in a lab, needs a more accurate weight (like an F1 class) than a large industrial floor scale (which might use an M1 class). Using the wrong class can lead to significant errors. We once had a client in food processing who was using M-class weights for their high-precision ingredient scale. They were having issues with inconsistent batches. We helped them understand that their scale required F1 class weights2 for proper calibration. After they switched, their product consistency improved immediately.
Here’s a simple breakdown of the common OIML classes:
| OIML Class | Typical Use Case | Accuracy Level |
|---|---|---|
| E1, E2 | Calibrating other weights; scientific research | Ultra High |
| F1, F2 | High-precision lab balances; quality control labs | High |
| M1 | Industrial scales, commercial scales, floor scales | Medium |
| M2, M3 | Heavy-duty industrial scales3, truck scales | Standard |
Choosing the right class is not about spending more money; it's about matching the tool to the job to ensure trustworthy results.
What are calibration weights made of?
Problem: You see weights made from different metals. Agitation: Choosing the wrong material can introduce errors from magnetism or corrosion. Solution: Know which material is right for your needs.
High-precision weights (like OIML Class E and F) are typically made from a single piece of non-magnetic stainless steel for its stability and resistance to corrosion. Industrial-grade weights (Class M) are often made from cast iron, which is durable and cost-effective for heavy-duty applications.

The material a weight is made from is not an arbitrary choice. It directly impacts its long-term stability and resistance to environmental factors. During my visits to our partner facilities that manufacture these weights here in China, I've seen the stark difference in how materials are handled. It's a fascinating look into why precision costs what it does. The choice of material is the first and one of the most critical steps in creating a reliable standard.
Stainless Steel for High Precision
For higher class weights (E1, E2, F1, F2), austenitic stainless steel is the material of choice. This specific type of steel has several key properties:
- High Density: It allows for a smaller physical size for a given mass.
- Corrosion Resistance: It won't rust or degrade easily, which would change its mass over time.
- Low Magnetic Susceptibility: This is critical. A magnetic weight would interact with electronic components in a modern scale, leading to false readings.
The stainless steel weights are machined from a single, solid piece of metal and polished to a mirror finish. This smooth surface minimizes the area where dust or moisture can cling and alter the weight. The process looks more like making jewelry than industrial equipment.
Cast Iron for Industrial Duty
For the workhorses of the industrial world, like our large floor scales or truck scales, M-class weights are the standard. These are typically made from grey cast iron. Cast iron is dense, extremely durable, and much less expensive than high-grade stainless steel. It's perfect for creating large masses, from 5 kg up to 5,000 kg. Because cast iron can rust, these weights are usually finished with a protective coating, such as a thick layer of durable paint, to seal them from the environment and ensure their mass remains stable.
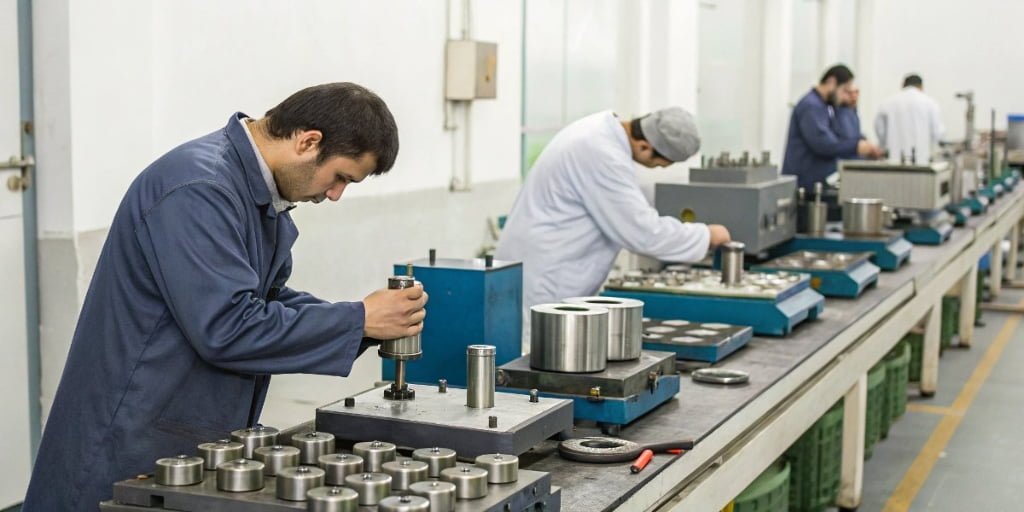
How is a calibration weight actually manufactured?
Problem: A metal block seems simple to make. Agitation: But any tiny error in its mass makes it useless as a standard. Solution: Discover the precise and careful manufacturing process.
The process begins by casting or machining the raw material into a rough shape. It's then carefully adjusted to the target mass, often by removing tiny bits of material from an internal cavity. Finally, it is polished, cleaned, and rigorously tested to ensure it meets its specified tolerance.

The real secret to a calibration weight isn't just the material, but the painstaking process of getting its mass exactly right. It’s a multi-step journey that combines heavy machinery with delicate, skilled handwork. Here’s a look at the typical steps involved.
The Manufacturing Steps
- Casting and Machining: The process starts by either casting molten metal into a rough form or machining it from a solid bar. This first step creates the basic shape of the weight, whether it's a cylindrical knob style or a large block. For higher-class weights, an adjustment cavity is machined inside.
- Coarse Adjustment: The weight is then adjusted to be very close to, but slightly heavier than, its final target mass. This is a rough-tuning phase to get it in the ballpark.
- Fine Tuning: This is the most critical stage. The weight is placed on an incredibly sensitive mass comparator4—a type of balance that compares the new weight to a known master standard. A skilled technician then carefully adds or removes minuscule amounts of material to or from the adjustment cavity. We're talking about removing metal dust or adding tiny pieces of wire to hit the mass target, which can be as precise as a few micrograms.
- Finishing and Polishing: Once the mass is perfect, the adjustment cavity is sealed. The entire weight is then polished. This isn't just for looks; it creates a smooth, non-porous surface that resists contamination from dirt, oils, and moisture.
- Certification: Finally, the finished weight is tested one last time in a controlled environment. Its mass is officially recorded, and it is given a calibration certificate5 that traces its accuracy back to a national or international standard.
Why are calibration weights so expensive?
Problem: You see the high price tag on a simple-looking metal block. Agitation: It feels like an unnecessary expense for your budget. Solution: Understand the hidden value and precision you are paying for.
Calibration weights are expensive because of the high-purity, stable materials used, the extremely precise manufacturing process with tiny tolerances, and the rigorous testing and certification required by international standards. You are paying for verified, traceable accuracy, not just a piece of metal.

I often get questions from clients about the cost of calibration weights6. It’s a valid concern, especially when building out a new facility or quality department. They see a small metal object and wonder why it costs so much. The price isn't for the metal itself; it's for the guarantee. It's the assurance that this specific object has a known and verified mass, which you can use to build a foundation of trust for your entire production process. The cost of one bad product batch due to an uncalibrated scale is almost always far greater than the cost of a proper set of weights.
Here’s a breakdown of where the cost comes from:
| Cost Factor | Explanation |
|---|---|
| Premium Raw Materials | High-grade, non-magnetic stainless steel7 is significantly more expensive than standard steel or iron. |
| Precision Manufacturing | Requires specialized machinery and highly skilled technicians. The process is slow and meticulous. |
| Labor-Intensive Adjustment | Fine-tuning the mass is often a manual process that takes time, expertise, and a very steady hand. |
| Certification & Traceability | Each weight is individually tested and certified. This process has a direct cost for lab time and documentation. |
| Special Handling | High-class weights are packaged in protective cases and must be handled with care to prevent any surface change. |
When you buy a calibration weight, you are investing in a piece of equipment that provides certainty.
How do you use weights to calibrate a scale?
Problem: You finally have the right calibration weights. Agitation: But using them incorrectly will give you a false calibration, making them useless. Solution: Follow a simple, reliable process every time.
First, stabilize the scale in its working environment, free from drafts and vibrations. Enter the scale's calibration mode, then place the specified calibration weight on the platter when prompted. The scale registers the mass and adjusts its internal software to match that standard.
As a scale manufacturer, we can't stress this enough: routine calibration8 is the most important maintenance task for guaranteeing accuracy. In our own quality control department, we calibrate our test scales daily before they are used to check the products shipping out to customers. It’s a non-negotiable step. While you should always follow your scale's specific manual, the general process is universal.
A Simple Guide to Calibration
- Prepare the Environment:
- Warm-Up: Turn the scale on and let it warm up for at least 30 minutes. This allows the electronic components to stabilize.
- Leveling: Ensure the scale is perfectly level. Most scales have a bubble level indicator for this.
- Minimize Interference: Close doors and windows to prevent air drafts. Make sure the table is stable and not vibrating.
- Handle Weights Correctly: Never touch calibration weights with your bare hands. Oils and dirt from your skin will change their mass. Use dedicated gloves or forceps.
- Perform the Calibration:
- Make sure nothing is on the scale and press the Zero or Tare button.
- Enter the scale's calibration mode. This usually involves holding down a button or navigating a menu.
- The scale's display will prompt you to place a specific mass on the platter (e.g., "CAL 1000g").
- Carefully place the specified weight in the center of the platter.
- Wait for the scale to stabilize and register the weight. It will typically display "End" or return to its normal weighing mode.
- Verify the Result:
- Remove the weight. The scale should return to exactly 0.0.
- Place the weight back on the scale. It should now read the exact mass of the weight (e.g., 1000.0g). This confirms the calibration was successful.
Conclusion
The creation of a calibration weight is a precise process. It combines special materials with expert skill to produce a trusted standard, ensuring your scales provide accurate, reliable measurements every day.
- Discover the role of OIML in setting standards for calibration weights. ↩
- Find out how F1 class weights are crucial for high-precision measurements. ↩
- Find out how industrial scales differ in calibration requirements. ↩
- Learn about the role of mass comparators in ensuring weight accuracy. ↩
- Discover the significance of calibration certificates in ensuring weight accuracy. ↩
- Understand the factors contributing to the high cost of calibration weights. ↩
- Explore the advantages of using non-magnetic stainless steel in calibration weights. ↩
- Explore the necessity of routine calibration for maintaining scale accuracy. ↩


Comments (0)