Getting inaccurate weight readings? These errors lead to production losses and compliance failures. Proper calibration is a simple process that ensures your scales are consistently accurate and reliable.
Calibration involves two main steps: zero point and span calibration. First, you set the scale to zero with nothing on it. Then, you place a known standard weight on the platform and adjust the scale to display that exact weight, ensuring accuracy across its full usage range.
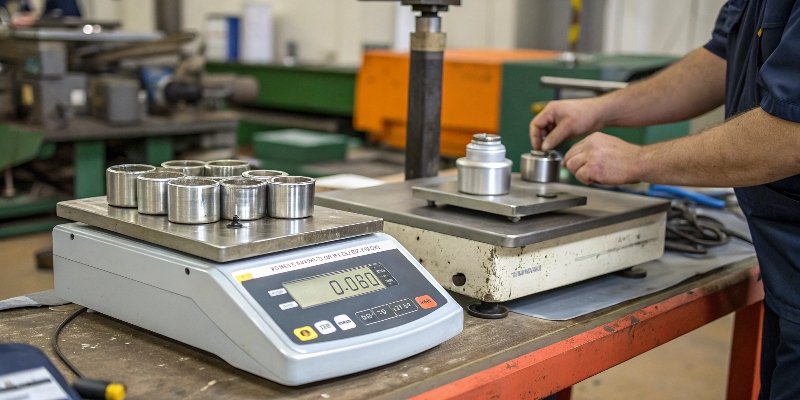
That's the basic idea, but getting it right is in the details. Proper calibration means following specific procedures and using the right tools. I've spent 18 years in this industry, and I’ve seen how small mistakes can lead to big problems. Let's walk through the exact steps we use at Weigherps to ensure every piece of equipment performs perfectly. This knowledge will help you trust the data your systems rely on.
What are the standard procedures for calibrating weighing machines?
Unsure about the correct calibration process? Following unclear steps can lead to worse inaccuracies. We use a standard procedure to guarantee reliable results for every single scale we manufacture.
The standard procedure starts with preparation: level the scale, ensure a stable environment, and preheat it. Then, perform a zero point calibration to set the empty scale to zero. Finally, complete a span calibration using standard weights to adjust for the full measurement range.
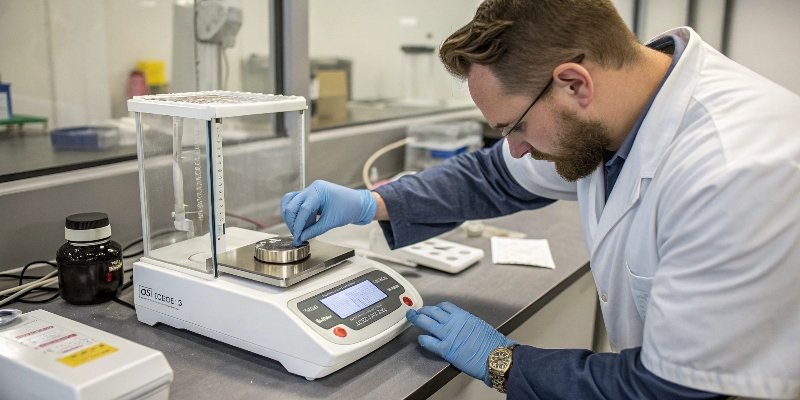
Calibrating a scale correctly is more than just placing a weight on it. As an OEM/ODM manufacturer for global brands, we follow a strict process that ensures every scale is a reliable weighing expert. It starts long before the actual calibration.
Preparation is Key
First, you need the right environment. We work in a controlled room at 20±5℃ with humidity below 80% RH. We keep scales away from sources of electromagnetic interference, like motors or transformers. Next, the scale must be perfectly level. We use the built-in spirit level to adjust the feet until the bubble is centered. Finally, we power on the scale and let its electronics warm up for at least 15 minutes. For high-precision equipment1, we recommend 30 minutes. This step is critical for stabilizing the internal components.
The Two-Step Calibration Process
Once the scale is prepared, the real work begins. It's a simple, two-part process.
| Step | Action | Purpose |
|---|---|---|
| 1. Zero Calibration | Clear the weighing platform and press the "Zero" or "Tare" button. You might need to enter a specific calibration mode. | This sets the baseline to 0.00, telling the scale to ignore the weight of the platform itself. |
| 2. Span Calibration | Place a known standard weight on the platform and follow the scale's menu to confirm the weight value. | The scale's software then calculates and saves a coefficient, ensuring accuracy across its entire weighing range. |
For our high-precision systems, we also perform linearity checks with multiple standard weights (e.g., 20g, 50g, 100g) to ensure accuracy is consistent at low, medium, and high capacities.
How often should weighing machines be calibrated for accurate results?
Wondering if you are calibrating enough? Over time, all scales experience 'drift,' making your measurement data unreliable. The right calibration schedule really depends on how and where you use your scale.
For industrial or commercial use where accuracy is critical, you should calibrate at least quarterly. For less demanding home or office use, annual calibration is usually sufficient. However, if a scale is moved or exposed to environmental changes, it must be calibrated immediately.

There is no single answer for every scale. In my 18 years of experience, I've learned that the right schedule is all about managing risk. A scale used in a production line, where every gram counts toward profit and quality, needs much more attention than a scale in a break room.
Factors Influencing Calibration Frequency
Several things can knock a scale out of calibration. These include frequent use, which causes normal wear on mechanical parts and the load cell2. Changes in ambient temperature or humidity also affect sensitive electronics, leading to drift. If you move a scale to a new location or if it suffers a physical shock, it needs immediate recalibration. For many of our clients in Europe and North America, industry regulations also dictate the minimum frequency to remain compliant.
A Recommended Schedule
Here's a simple guide we provide our partners to help them advise their customers:
| Use Case | Recommended Frequency | Reason |
|---|---|---|
| Commercial/Industrial | Quarterly (every 3 months) | High usage, financial impact, regulatory compliance needs. |
| Laboratory/High-Precision | Monthly or on-demand | Extremely sensitive work requires constant accuracy verification. |
| General Home/Office Use | Annually (once a year) | The impact of minor inaccuracies is low. |
For software vendors, whose systems depend on accurate data from our scales for things like inventory or process automation, I always recommend a quarterly schedule for end-users. It protects the data integrity of your entire solution.
What equipment is needed to calibrate different types of weighing machines?
Are you calibrating with the wrong items? Using make-shift weights can give you a false sense of security or even damage your scale. The correct equipment is simple but essential for true accuracy.
The most crucial equipment is a set of standard calibration weights. These weights must be certified and appropriate for your scale's capacity and resolution. For emergencies, you can use known-weight objects, but this is not recommended for professional or commercial applications.
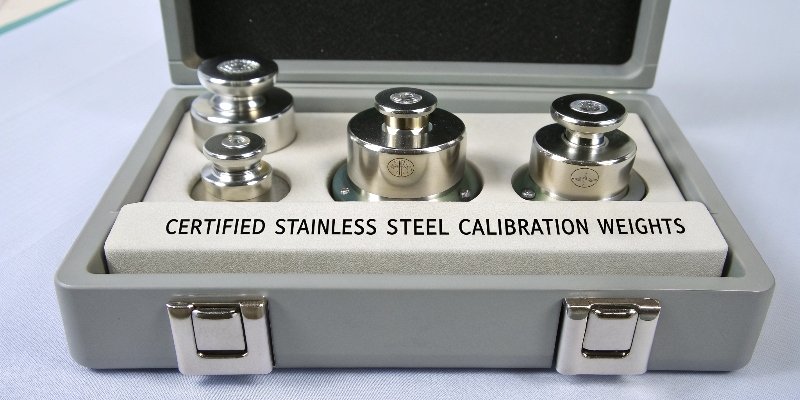
Having the right tool for the job is non-negotiable in our production facility. For calibration, that tool is almost always a set of certified weights3. The quality of your calibration depends entirely on the accuracy of the weight you use.
The Gold Standard: Certified Weights
We use "standard weights," which are not just random pieces of metal. They are manufactured to incredibly tight tolerances and come with a certificate that traces their mass back to international standards. These weights are sorted into accuracy classes. For example, we might use high-precision E2 class weights for lab balances but more robust F1 or M1 class weights for the industrial floor scales we build for our partners. Using a weight with poor accuracy to calibrate a high-resolution scale makes the process useless. We always recommend using a calibration weight that is at least 50% of the scale's total capacity for the best results.
An Emergency-Only Method
What if you don't have standard weights available? For a quick, non-critical check, you can use an object with a roughly known weight, like an unopened can of soda or a specific combination of coins. However, we always warn our clients that this is an emergency measure only. The actual weight of these items can have a variance of more than 0.5%, which is a massive error in any professional setting. It is a last resort, not a proper calibration4 practice.
What are the common errors to avoid during the calibration of weighing machines?
Worried your calibration isn't working? Small, common mistakes can make your scale even less accurate than it was before. Avoiding these simple errors is the key to a perfect calibration every time.
Common errors include not leveling the scale, failing to let it warm up, calibrating in an unstable environment with drafts or vibrations, and using non-certified or dirty weights. Another mistake is not placing the weight in the center of the platform.

After overseeing quality control on thousands of scales, I've seen the same simple mistakes made over and over. They are easy to avoid but can completely ruin your accuracy if you're not careful. Let's break them down.
Environmental and Preparation Mistakes
Many of the biggest errors happen before you even touch a calibration weight. Skipping the warm-up period means the electronics are not stable, so your calibration won't hold. Another is not leveling the scale; if it's tilted, the force on the load cell is incorrect. Finally, the environment itself is a huge factor. A small draft from an air vent or vibrations from nearby machinery can throw off the readings of a sensitive scale, making your calibration invalid from the start.
Common Procedural Errors
During the actual process, other mistakes can creep in. Here are the most frequent ones we troubleshoot with our clients:
| Common Error | Why It's a Problem | How to Avoid It |
|---|---|---|
| Using Dirty/Damaged Weights | Dust, grease, or dents change the certified mass of the weight, introducing error. | Always clean and inspect your standard weights before use. Store them carefully in their protective case. |
| Incorrect Weight Placement | Placing a weight on the corner can cause inaccurate readings due to corner-load discrepancy. | Always place the calibration weight directly in the center of the weighing platform for accurate results. |
| Skipping Verification | A successful calibration with a 100g weight doesn't guarantee accuracy at 50g. | After calibrating, test the scale with a different, non-calibration standard weight to verify its linearity. |
If you follow all these steps and still find an error greater than 0.1g, it may indicate a deeper issue with the sensor or electronics, and it's time to contact a professional for service.
Conclusion
Proper, regular calibration is not complex. Following these standard procedures ensures your weighing machines provide the accurate, reliable data your business depends on for success and growth.
-
Explore the characteristics of high-precision equipment to ensure your calibration meets stringent standards. ↩
-
Learn about load cells to better understand their role in accurate weight measurement. ↩
-
Understanding certified weights can help you ensure the accuracy of your calibration process. ↩
-
Discover the essential steps for proper calibration to maintain accuracy and reliability in your measurements. ↩


[…] specifically requires you to determine the minimum weight3 that a scale can accurately measure. Weighing samples below this minimum […]