Inaccurate lab results can waste time and resources. A small measurement error can compromise your entire project. Regular calibration and proper maintenance are key to ensuring your balance always gives accurate readings.
To ensure accuracy, regularly calibrate your balance using either its internal function or external standard weights. Keep it clean, level, and in a stable environment free from drafts and vibrations. Following these simple steps will maintain its precision and extend its life.

Getting accurate measurements1 from your lab balance is crucial. I've spent 18 years in the industrial weighing industry, and I've seen how often small mistakes lead to big problems. It's not just about pushing a button; it's about understanding the "why" behind each step. Let's break down the process together, so you can feel confident in every measurement you take. We'll start with how often you should be doing this.
How often does a laboratory balance need to be calibrated?
Unsure about your calibration schedule? This doubt can lead to unreliable data, putting your team's work at risk. A consistent calibration routine is the simple solution for trustworthy results.
For best results, calibrate your lab balance daily or before each use. Also, recalibrate it if it's moved, after a power outage, or if there are significant temperature changes. A professional service should check it annually to certify its performance and accuracy.

At Weigherps, we always tell our clients that the right calibration frequency2 depends on your specific needs. It's about managing risk. If you are working in a regulated industry like pharmaceuticals or quality control, your SOPs3 will likely demand daily calibration. For less critical applications, like in a university teaching lab, weekly checks might be enough. Think about the cost of an incorrect measurement. If a bad reading could cause a product recall, you need to calibrate more often. It’s a simple cost-benefit analysis.
Factors Influencing Calibration Frequency
The environment and usage patterns play a huge role. Here’s a simple guide we provide to our partners.
| Usage Level | Environment | Recommended Frequency |
|---|---|---|
| High (Multiple times a day) | Stable, controlled | Daily |
| Moderate (Daily) | Some temperature fluctuations | Daily or before each session |
| Low (A few times a week) | Unstable, dusty | Before each use |
| Any Level | After moving the balance | Immediately |
Ultimately, your internal quality standards should define the schedule. More frequent checks give you greater confidence and ensure your data is always defensible.
What are the most common causes of weighing inaccuracies with a lab balance?
Getting inconsistent readings from your balance is frustrating. This unreliability can delay your projects and make you doubt your data. Learning the common causes helps you quickly solve these issues.
The most common causes of weighing inaccuracies are an unlevel balance, air drafts, vibrations, and temperature changes. User errors, like improper handling of samples, and static electricity can also affect readings. Regular checks for these factors will improve your balance's performance significantly.

Over my 18 years of building and servicing scales, I've seen it all. Inaccuracy almost always comes down to one of three areas: the environment, the equipment itself, or the user. It’s rarely the balance's core technology that fails, especially with modern electronics from a reliable manufacturer like us. It's the small things that add up.
Environmental Factors
Your balance is sensitive. Think of it like a delicate instrument. Air conditioning vents blowing directly on it, vibrations4 from nearby equipment like a centrifuge, or even direct sunlight can cause the reading to drift. The ideal spot is a sturdy, dedicated weighing table in a quiet corner of the lab, away from doors and heavy foot traffic.
Equipment and User Issues
Sometimes, the problem is simpler. Is the balance level? Check the bubble indicator. Is the weighing pan clean? Debris adds weight. Another big issue we see is static electricity5, especially in dry environments. It can make powders jump or repel from the pan. Using an anti-static device can solve this. Also, always let samples cool to room temperature before weighing. A hot sample creates air currents inside the draft shield6, making the reading unstable and inaccurate.
What is the difference between internal and external balance calibration?
"Internal" or "external" calibration options can be confusing. Using the wrong method might mean your balance isn't truly accurate. Knowing the difference ensures your measurements are always trustworthy.
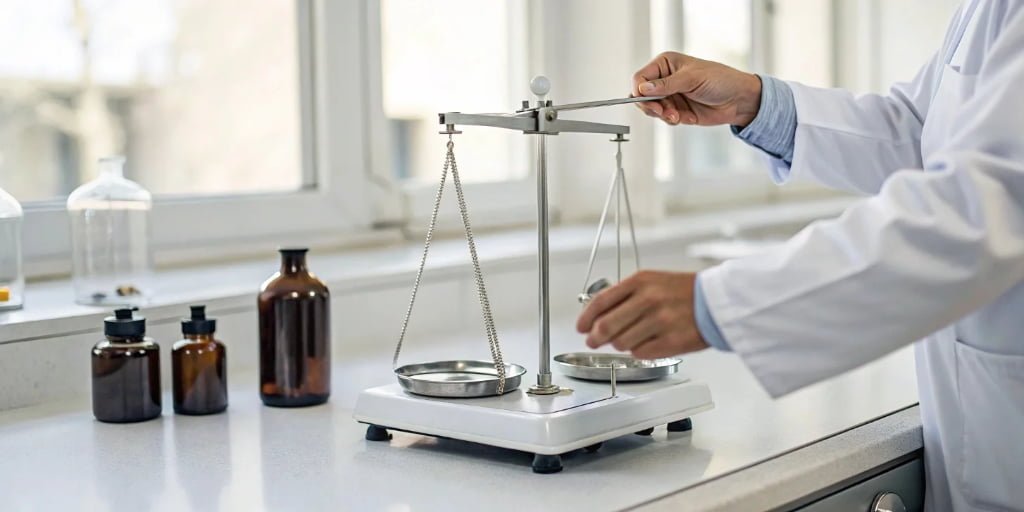
Internal calibration is an automated process where the balance uses a built-in house weight to adjust itself. External calibration is a manual process where you place a certified, known-mass external weight on the pan and tell the balance to adjust to that standard.

As a manufacturer, we offer both types of calibration in our scales because they serve different purposes. Think of internal calibration7 as a quick, convenient self-check. External calibration is a more rigorous check against a known, certified standard that is traceable back to international standards.
The Calibration Process Explained
The user experience is the biggest difference. Internal calibration is very hands-off, saving you time. External calibration requires your direct involvement and a set of certified weights. Here's how we explain the steps to our customers:
| Calibration Type | Steps | Best For |
|---|---|---|
| Internal | 1. Enter the menu. 2. Select "Auto-Calibration." 3. The balance uses its internal motor-driven weight to self-adjust. No user action is needed. |
Daily checks, temperature adjustments, convenience. |
| External | 1. Warm up the balance for 30-60 minutes. 2. Select calibration mode. 3. Place the certified standard weight8 on the pan. 4. Wait for the display to stabilize and confirm. |
Periodic verification, regulatory compliance, certifying accuracy. |
While internal calibration is perfect for routine adjustments, external calibration9 verifies that the balance is accurate according to a traceable external standard. Most quality assurance programs require periodic external calibration documented by a professional.
What are the best practices for cleaning and handling a sensitive analytical balance?
Afraid of damaging your balance during cleaning? A wrong move can cause expensive damage and faulty readings. Simple cleaning and handling best practices will keep your equipment safe and accurate.
Use a soft brush to remove dust and spilled powder. Clean surfaces with a lint-free cloth dampened with a mild cleaner like 70% ethanol. Never spray liquid directly onto the balance. Always handle the balance gently and avoid touching the weighing pan with your bare hands.

Your analytical balance10 is a precision instrument, and treating it as such is the key to a long service life. When we design our scales at Weigherps, we build them to be robust for industrial environments. Still, proper care is non-negotiable for maintaining high accuracy. The biggest mistakes we see in after-sales service come from improper cleaning.
Cleaning Do's and Don'ts
Do:
- Unplug the balance before cleaning.
- Remove the weighing pan and draft shield panels for easier access.
- Use a very soft camel-hair brush to gently sweep away particles from the inside.
- For stubborn residue, use a lint-free cloth lightly moistened with isopropyl alcohol or 70% ethanol.
Don't:
- Never spray or pour cleaning fluid directly on the balance. Liquid can seep into the electronics and damage the load cell11.
- Avoid abrasive cleaners or harsh solvents like acetone, as they can damage the plastic components and anti-reflective coatings on the glass.
- Don't use compressed air to blow away dust. It can force particles into the internal weighing mechanism, causing significant damage.
Gentle handling is just as important. Never drop objects onto the pan or overload the balance beyond its capacity. These simple routines prevent most common issues and ensure your balance has a long, productive life.
Conclusion
Consistent calibration, a stable environment, and careful handling are essential. Following these practices ensures your lab balance provides accurate, reliable data every single time you use it.
-
Explore techniques to enhance measurement accuracy, which is vital for successful lab outcomes. ↩
-
Find out the recommended calibration frequency to maintain accuracy and reliability in your lab. ↩
-
Understanding Standard Operating Procedures (SOPs) is essential for compliance and accuracy in labs. ↩
-
Discover how to minimize vibrations to enhance the reliability of your balance readings. ↩
-
Learn how to mitigate static electricity to ensure precise measurements in your lab. ↩
-
Understanding the role of a draft shield can enhance your balance's performance in variable environments. ↩
-
Learn about internal calibration methods to streamline your balance's accuracy checks. ↩
-
Learn about certified weights to ensure your calibration process meets industry standards. ↩
-
Discover the significance of external calibration for ensuring compliance and accuracy in measurements. ↩
-
Explore the features and applications of analytical balances for precise measurements. ↩
-
Gain insights into load cell technology to better understand balance accuracy and functionality. ↩


Comments (0)