Inaccurate scales cost you money and compromise quality. Agonizing over unreliable data? Simple tests can verify your scale's accuracy, ensuring precision and trust in your measurements.
To test your scale's accuracy, start with a stable, level surface and allow the scale to warm up. Use standard calibration weights. Place a known weight on the scale and check if the reading matches. Repeat this test several times to ensure consistent, reliable results.

Ensuring your scale is accurate is fundamental, whether you're in a high-tech lab or your own workshop. As an industrial scale manufacturer for over 18 years, I've seen how small inaccuracies can lead to big problems. But don't worry, verifying your scale's performance is straightforward. Let's walk through the steps to build confidence in every measurement you take. These methods are simple, effective, and will save you headaches down the road.
How do you check if a digital scale is accurate?
You rely on your digital scale daily, but how can you be sure it's correct? Agonizing over potential errors? A few quick checks using standard weights can confirm its accuracy instantly.
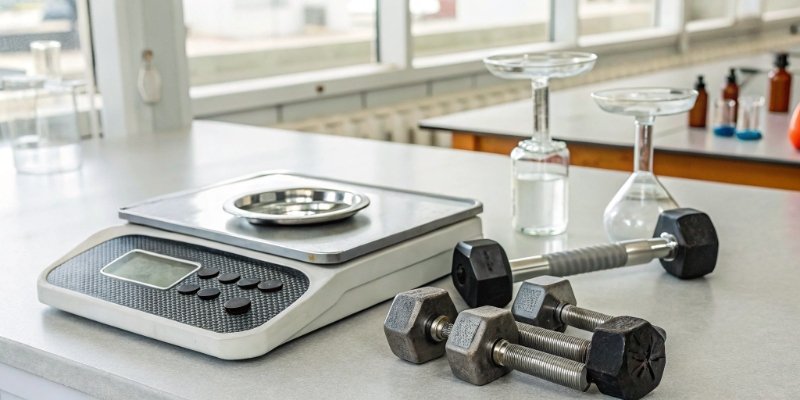
Check a scale's accuracy by placing it on a flat, stable surface, away from drafts. Zero the scale, then place a known calibration weight in the center of the pan. The displayed weight should match the standard weight within the scale's specified tolerance. Repeat to test for consistency.

Going deeper than just placing a weight in the center is crucial for professionals. A truly accurate scale must perform well under different conditions. I always advise our clients to perform a few extra checks.
The Corner Load Test
A scale should give the same reading no matter where you place the weight on the platform. Place a weight in the center and note the reading. Then, move the same weight to each corner of the platform. The readings should remain consistent. This tests the load cell1's response across the entire surface. Significant variations indicate a potential hardware issue.
The Repeatability Test
Consistency is key. This simple test checks if your scale gives the same result for the same object over and over. Place a weight on the scale, record the reading, and remove it. Repeat this process 5-10 times. The readings should be identical or vary only by the smallest increment. Any major fluctuations point to a problem.
The Linearity Test
This checks accuracy across the scale's full capacity range. A scale might be accurate with light objects but inaccurate with heavy ones. This test verifies its performance from zero to its maximum load.
| Test Step | Action | Expected Result |
|---|---|---|
| Step 1 | Zero the scale. Place a light weight (e.g., 20% of capacity). | The reading should be accurate. |
| Step 2 | Add more weight (e.g., up to 50% capacity). | The reading should remain accurate. |
| Step 3 | Continue adding weight up to full capacity. | Accuracy must be maintained across the entire range. |
If your scale is accurate at 100g but off at 1kg, it has a linearity problem. This is something our quality control department rigorously tests before any product ships from our factory.
How can you make a digital weighing scale accurate?
Is your scale giving inconsistent readings, causing production delays? Frustrated with unreliable equipment? Proper setup and regular calibration are the keys to restoring and maintaining its accuracy.
To make a scale accurate, first ensure it's on a level, vibration-free surface and has warmed up for at least 15-30 minutes. Then, perform a calibration using certified weights according to the manufacturer's instructions. Regularly cleaning the scale also prevents errors from debris.

Making a scale accurate isn't a one-time fix; it's about maintaining a proper process. For the OEM/ODM products we manufacture, we provide detailed guides because we know that the user's environment and procedure are major sources of inaccuracy.
Environmental Control is Key
The scale's surroundings matter more than you think. You must use a solid, perfectly level surface. I recommend using a small bubble level to check. Also, keep the scale away from anything that can cause interference:
- Air Drafts: Avoid placing it near fans, air conditioners, or open windows. Even breathing on a high-precision scale can affect the reading.
- Vibrations: Keep it away from heavy machinery or high-traffic areas.
- Electromagnetic Fields: Microwaves, cell phones, and other electronics can interfere with sensitive load cells.
- Temperature: A stable room temperature is best. Drastic temperature changes cause the sensitive metal and electronic components to expand or contract, leading to measurement drift2.
Proper Warm-Up Procedure
Think of a scale like any other piece of high-tech electronics. It needs time to stabilize. The internal components need to reach a stable operating temperature for best performance. For most industrial scales, we recommend a 15-30 minute warm-up. For high-precision lab scales, this can be even longer. Just plug it in, turn it on, and let it sit before you begin any serious work.
The Importance of Professional Calibration
If your scale is still off after following all these steps, it's time for service. Don't try to open the scale and adjust internal components yourself. This can void the warranty and cause more damage. As a manufacturer, we provide a 12-month after-sales service guarantee. A qualified technician can diagnose the issue, perform a professional calibration using certified equipment, and ensure it complies with industry standards.
How do you calibrate a digital weighing scale at home?
Don't have certified weights for calibration? Worried you can't test your scale at home? You can use common household items with known weights to perform a reliable quick check.
To calibrate a scale at home without professional weights, find an item with a known, government-regulated weight, like an unopened 500ml bottle of water (500g) or a coin. Enter the scale's calibration mode (check your manual) and follow the prompts to calibrate using your reference item.

While professional calibration weights3 are the gold standard, you can get a surprisingly good estimate of your scale’s accuracy using items you already have. This is perfect for less critical applications or as a quick sanity check before a professional service.
Using Known-Weight Items
Many everyday items have a standardized weight because of government regulations. These can serve as useful, if not perfect, reference points.
| Item | Approximate Weight | Notes |
|---|---|---|
| Unopened 500ml Water Bottle | 500 grams | The water inside weighs 500g, plus a few grams for the bottle. |
| Bag of Sugar/Flour | 1000 grams (1kg) | Check the weight printed on the package. Best if unopened. |
| US Nickel Coin | 5 grams | US coins are minted to strict weight specifications. |
| US Penny Coin (post-1982) | 2.5 grams | Pennies minted after 1982 have a consistent weight. |
These are not as precise as a certified M1 class weight, but they are great for a quick check. If your scale reads a nickel as 7 grams, you know there's a problem.
The Smartphone Trick
Here's a method I have used myself. Take your smartphone to a place with a certified scale, like a post office or a trusted supplier. Weigh your phone and write down the exact weight. Now, you can use your phone as your personal, portable "calibration weight" to check other scales.
A Step-by-Step Home Calibration Guide
Most consumer scales have a built-in calibration function.
- Find the Calibration Mode: This usually requires holding down a button like "CAL," "MODE," or "ZERO" when you turn the scale on. Your user manual is the best source for this information.
- Zero the Scale: The display will usually prompt you to clear the platform so it can establish a zero point.
- Add the Calibration Weight: The display will then flash a specific weight it wants you to use (e.g., "500g"). Place your 500ml bottle of water on the scale.
- Confirm: The scale will process, lock in the reading, and often display "PASS" or "END." It will then return to normal weighing mode, now calibrated to your reference weight.
How do you get an accurate reading on a digital scale?
You've calibrated your scale, but readings still fluctuate. Feeling frustrated by inconsistency? Your technique matters just as much as the scale. Follow simple best practices for perfect readings every time.
For an accurate reading, always place the scale on a hard, level surface. Let it warm up and zero it before use. Place the item gently in the center of the platform and wait for the reading to stabilize. Avoid air currents and vibrations during measurement.

Getting a consistently accurate reading involves more than just having a good scale; it's about using it correctly. At Weigherps, we not only design robust weighing systems but also educate our customers on best practices to eliminate user error. This is crucial, especially for our clients who integrate our hardware with their sophisticated software.
Placement is Everything
The most common mistake I see is placing a scale on an unstable or uneven surface.
- Never use a carpet or mat. These soft surfaces allow the scale to wobble, which will throw off the reading. Always use a hard, flat floor or a sturdy workbench.
- Center the object. Placing items on the edge of the platform can cause inaccuracies, as we saw in the corner load test. The load cells are calibrated for weight distributed from the center.
Mind the Environment
We discussed this earlier, but it is worth repeating. The perfect scale in the wrong environment will fail.
- Temperature Stability: Do not move a scale from a cold room to a warm room and expect an accurate reading immediately. Let it acclimate for at least 30 minutes.
- No Air Movement: For high-precision scales4, a draft shield is essential. For larger industrial scales, ensure they are away from loading bay doors or powerful HVAC vents.
Master Your Technique
How you handle the scale and your items makes a difference.
- Tare Correctly: If you're using a container, place the empty container on the scale first and press the "TARE" or "ZERO" button. This subtracts the container's weight, so you only measure the contents.
- Don't Drop Items: Place items gently onto the platform. Dropping them can shock the load cell and cause damage over time.
- Wait for Stabilization: The reading might fluctuate for a second or two. Wait for the number to become solid and for any stabilization indicator to appear before recording the weight.
By following these simple rules, you can trust that the number you see on the display is the right one.
Conclusion
By regularly testing, calibrating, and using your scale correctly, you ensure every measurement is accurate, giving you the confidence you need in your data and products.
-
Gain insights into load cells and their role in ensuring scale accuracy. ↩
-
Learn about the factors that can lead to measurement drift and how to prevent it. ↩
-
Learn how calibration weights can enhance the precision of your measurements. ↩
-
Explore the features and applications of high-precision scales. ↩


Comments (0)