Setting up a new digital scale seems easy, but one wrong step can lead to costly errors. Inaccurate data can ruin an entire production batch, costing you time and money.
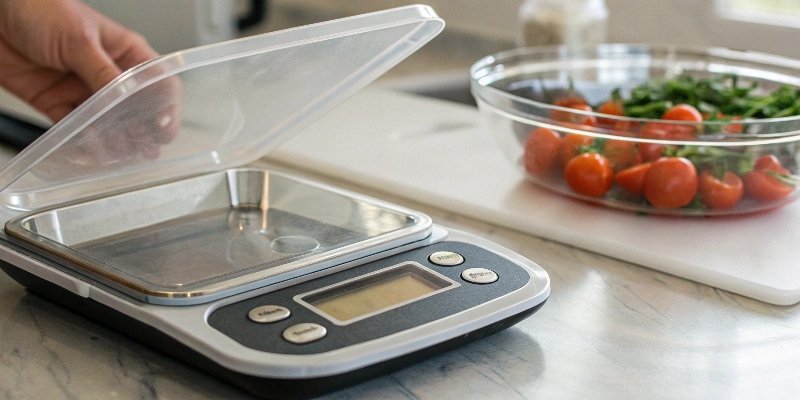
To set a digital scale properly, you must place it on a stable, level surface free from vibrations and drafts. Allow it to warm up for at least 30 minutes, then select your desired unit of measurement and use the "Zero" or "Tare" function before weighing.

Getting these basics right is the foundation for accuracy. I know you probably have more specific questions, like how to switch units or what to do when the scale acts up. I've seen it all in my 18 years in this business. Let's break down the most common questions to ensure your scale is always a tool you can trust, not a problem you have to solve.
How to set a digital scale to grams?
Your scale is showing pounds, but your entire process runs on grams. Constantly doing manual conversions is slow, annoying, and opens the door for human error. It's a simple fix.
To set a digital scale to grams, turn on the scale and look for a button labeled "Unit," "Mode," or "g/oz." Press this button repeatedly until the display shows "g" for grams. Your scale is now ready to measure in the correct unit.

This simple function is more important than it looks, especially in automated environments. I once visited a client in the food processing industry whose new automated system was throwing constant errors. It took us a while to figure it out. It turned out half of their new scales were set to 'oz' by default, not 'g'. The software was getting conflicting data, causing chaos. A simple button press solved a problem that had cost them thousands in wasted product and downtime.
Why Data Consistency Matters
For software vendors and system integrators, consistent units are everything. Your software expects data in a specific format. If a scale sends data in ounces instead of grams, your system might misinterpret it or reject it entirely. Ensuring all scales are set to a single, standard unit like grams is the first step toward reliable data integration.
Finding the "Unit" Button
Most professional industrial scales make this easy. Look for a dedicated button on the front panel. Here are the common labels to look for:
| Button Label | Common Units available |
|---|---|
| Unit | g, kg, lb, oz |
| Mode | Toggles between weighing modes and units |
| g/oz/lb | Directly cycles through specific units |
If you can't find the button, check the user manual. Setting the correct unit from the start saves a lot of headaches later.
How do you set your weight scale?
You just unboxed a new scale, but just plugging it in isn't enough. An improperly set up scale gives you garbage data, which compromises your entire quality control and production process.
Properly setting your weight scale starts with the environment. Place it on a completely level and stable surface, far from machinery vibrations or air currents. Then, let it warm up for at least 30 minutes to stabilize the electronics before you even think about calibrating it.

I've seen so many accuracy issues that had nothing to do with the scale itself, but everything to do with where it was placed. A high-quality scale is a sensitive instrument. It needs a good home to do its job right. Think of it as building a house; you need a solid foundation before you can do anything else. Rushing the initial setup will only lead to problems down the road.
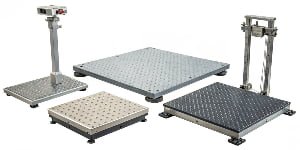
The Foundation: A Stable, Level Surface
Your digital scale works using a load cell1, a sensor that measures force. If the scale isn't level, the force of the weight isn't distributed correctly, which leads to inaccurate readings.
- Use a spirit level: Most of our industrial benches have a built-in bubble level. Use it.
- Avoid vibrations: Don't place your scale next to a running generator, a conveyor belt, or heavy machinery. Even small vibrations can throw off the reading.
- Eliminate drafts: Air conditioning vents, open windows, or even people walking by can create enough air movement to affect high-precision scales.
Why Preheating is Non-Negotiable
When you first turn on a scale, its internal electronic components are cold. As they warm up, their electrical properties change slightly. This is called thermal drift2, and it can cause the readings to wander. Allowing the scale to warm up for 30-60 minutes lets these components reach a stable operating temperature. Skipping this step is like trying to run a marathon without stretching – you're just asking for trouble. For our clients who need the highest precision, we always tell them to leave the scale powered on.
How to set a digital scale to zero?
You need to weigh a product inside a bowl, but the scale shows the weight of both. Manually subtracting the bowl's weight for every single measurement is a massive waste of time.
To set a digital scale to zero, ensure the weighing platform is empty and press the "Zero" or "Tare" button. This resets the display to 0.00. This is also how you cancel out the weight of a container before adding your product for an accurate measurement.

Years ago, I visited a small warehouse where employees were weighing parts in large plastic bins. They had a notepad next to the scale where they would write down the bin's weight, then the total weight, and then do the math by hand. When I showed them the "Tare" button, it was like a magic trick. It completely changed their workflow and improved their efficiency overnight. This simple button is one of the most powerful features on any scale.
Zero vs. Tare: What's the Difference?
While the buttons often look similar, they have slightly different jobs.
- Zero: You press this button when the platform is empty to make sure the scale starts at a true zero point. It corrects for any minor drift or dust on the platform.
- Tare: You press this button after placing an empty container on the scale. It subtracts the container's weight and sets the display back to zero, so you only measure the weight of the product you add next.
How to Use the Tare Function
This function is critical for automated systems3 that your software might control. Here is the process:
- Turn on the scale and let it stabilize.
- Place the empty container (bowl, box, beaker) on the platform.
- Wait for the reading to become stable.
- Press the "Tare" button. The display will return to "0.00".
- Add the product you want to measure into the container. The display will now show only the net weight of the product.
This Tare command can often be sent electronically from a central system, making it essential for efficient, automated filling and batching processes.
How do I reset a digital weight scale?
Your trusted scale is suddenly giving inconsistent readings. You can't trust the data, production is at a standstill, and you're not sure what to do next. Is it broken?
To perform a simple reset, try a power cycle: turn the scale off, unplug it for 30 seconds, then plug it back in and turn it on. If accuracy is still an issue, you need to perform a full recalibration using a certified standard weight to restore its factory precision.

A reset isn't just about turning it off and on again. When we talk about resetting a scale in the industrial world, we are usually talking about recalibration. This process is like tuning a musical instrument; it realigns the scale's internal sensor with a known, true standard of mass. Over time, due to temperature changes, use, or being moved, all scales can drift slightly. Regular recalibration is the only way to ensure the data your software receives is 100% accurate.
When to Recalibrate Your Scale
You don't need to wait for a problem to recalibrate. It should be part of your regular maintenance schedule. How often you do it depends on your needs. For a lab, it might be weekly. For a busy production line, it should be done daily. A full recalibration is needed if:
- The scale has been moved.
- You are getting inconsistent readings.
- The temperature or humidity of the room has changed significantly.
- It's been a long time since the last calibration.
The Standard Weight Calibration Process
To do this right, you need a standard calibration weight. The process is straightforward:
- Enter the scale's calibration mode (this usually involves pressing a specific key combination, check your manual).
- The scale will prompt you to place a specific weight on the platform (e.g., 50.00g).
- Carefully place the certified 50g weight on the center of the platform.
- The scale will automatically adjust itself to that standard and save the new setting.
For environments that require certified accuracy, like for trade, this calibration needs to be done by a professional service.
| Calibration Check | Recommendation | Why It's Important |
|---|---|---|
| Frequency | Daily for industrial, weekly for labs | Ensures consistent accuracy over time. |
| Environment | Stable temperature and humidity | Prevents environmental factors from causing errors. |
| Validation | Test with a known weight after calibration | Confirms the calibration was successful. |
Conclusion
Properly setting up your scale—from placement and choosing units to regular calibration—is the key to accurate, reliable data. It's a simple process that builds trust and protects your bottom line.

Comments (0)