Your floor scale is offline, bringing your workflow to a halt. This downtime is costing you money and causing delays. Find simple, actionable steps here to fix it fast.
When your industrial floor scale isn't working, first check the power supply, cables, and ensure the platform is level and clean. Often, simple environmental issues or loose connections are the culprit. If these basic checks fail, a reset or recalibration might be necessary.

Those first steps solve many common issues. But what if the problem is more specific? Maybe it's not the power, but something deeper within the scale's system. Let's break down the most frequent problems you might face. Understanding the root cause is the key to preventing it from happening again.
Why is my weighing scale not working?
Your scale is giving strange readings, or none at all. This unreliability can disrupt your entire production line. Let's diagnose the issue by checking a few key areas first.
A scale might not work due to power issues, an unstable surface, or physical obstructions. Check the power cord and outlet first. Then, ensure the scale is level and that no debris is stuck under the platform. These simple checks often solve the most common problems immediately.

When a scale stops working, it's usually for a simple reason. I've seen it many times over my 18 years in this industry. Before you call for service, we always recommend running through a basic checklist. It can save you time and money.
Basic Environmental and Power Checks
Start with the most obvious things. The scale's environment plays a huge role in its accuracy and function. Also, a scale is an electronic device, so power is fundamental.
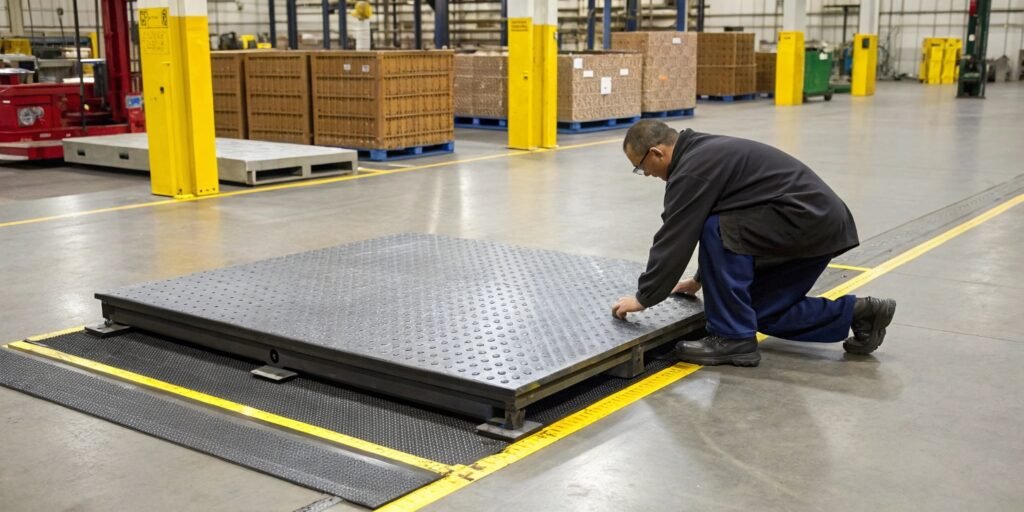
- Check the Surface: Is the scale on a perfectly flat, level surface? Use a level to check. All four feet should be firmly on the ground. An uneven base is a common cause of errors.
- Look for Obstructions: Get down and look under the scale. Dirt, debris, or even a stray bolt can jam the platform and prevent it from weighing correctly.
- Inspect the Power: Is the power cord plugged in securely at both ends? Try a different outlet to rule out a faulty socket. If your scale is battery-powered, check if the battery is charged or needs replacing.
Here’s a simple table to guide your initial checks.
| Check Area | What to Look For | Quick Fix |
|---|---|---|
| Environment | Uneven ground, vibrations, air drafts | Move scale or level feet, shield from drafts. |
| Cleanliness | Debris under or around the weighing platform | Clean the area thoroughly. |
| Power | Loose cables1, dead battery, faulty outlet | Secure cables, charge/replace battery, test outlet. |
| Cabling | Damaged or loose sensor/display cables | Inspect and reseat connections carefully. |
Following these steps will resolve many "not working" issues right away.
What is the common problem of weighing scales?
The scale turns on, but the readings are all over the place. These persistent errors are frustrating and can lead to costly mistakes. Let's look at the most common internal faults.
The most common problems are zero point drift, calibration errors, and sensor failures. Zero drift means the scale doesn't return to zero when empty. Calibration errors cause consistent inaccuracy. Sensor damage, often from overloading or impact, can cause total failure or erratic readings.

After 18 years of manufacturing scales, we've compiled data on the most frequent failure points. Beyond power and placement, the issues usually fall into three categories: sensors, the display, or the mechanical structure2 itself.
Sensor and Display Faults
The sensor, or load cell, is the heart of the scale. It's also very sensitive.
- Zero Point Drift: If your scale shows a weight when it's empty, you have a zero drift problem. This can be caused by temperature changes or a faulty sensor. Try to reset the scale first.
- Display Errors: Does the screen show random characters, flicker, or is it just blank? This could be a loose connection between the display and the mainboard, or the display itself might be damaged. A simple restart can sometimes fix this.
Mechanical and Structural Issues
The physical frame of the scale is just as important as the electronics.
- Platform Jamming: If the weighing platform can't move freely, it can't measure weight. Check that the limiters aren't too tight and that nothing has fallen into the gaps around the platform.
- Frame Damage: A bent or deformed frame can put uneven pressure on the load cells, leading to major errors. This is often caused by dropping a heavy load onto the scale. Visual inspection is key here.
If you suspect a sensor is damaged, avoid opening it up yourself. They are delicate and require professional handling.
How do I reset a floor scale?
The scale display is frozen or showing a weird error. You're stuck and can't continue work. Before calling for support, a simple reset procedure can often solve the problem.
To reset a floor scale, first try a power cycle. Unplug the scale from its power source, wait for 30 seconds to a minute, and then plug it back in. For some models, there might be a specific reset button or a key combination in the manual.

A reset is like a reboot for your computer. It can clear temporary glitches, software bugs, or error codes3 that have locked up the system. I always tell my clients to try this before anything else. It's surprisingly effective. There are two main ways to do it.
The Power Cycle Reset (Soft Reset)
This is the simplest method and works for most electronic scales. It clears the device's temporary memory without affecting its calibration or other saved settings.
- Remove All Weight: Make sure the scale platform is completely empty.
- Disconnect Power: Unplug the scale from the wall outlet. If it uses a battery, remove the battery as well.
- Wait: Leave the scale completely powerless for at least 60 seconds. This allows all the internal capacitors to discharge fully, clearing any lingering electronic glitches.
- Reconnect and Power On: Plug the scale back in (or reinsert the battery) and turn it on.
- Check: The scale should boot up and stabilize at zero.
The Factory Reset (Hard Reset)
This is a more drastic step and should only be used if a power cycle4 doesn't work. Warning: A factory reset5 might erase your calibration settings. You will likely need to recalibrate the scale afterwards. The procedure varies by model, so you must consult your user manual. It often involves pressing a combination of keys while powering on the device.
How to calibrate industrial scales?
Your scale seems to work, but you know the weights are off. This can lead to shipping errors and lost profit. Let's walk through the calibration process to restore accuracy.
To calibrate an industrial scale, you need certified test weights. First, put the scale into calibration mode (check your manual). Then, follow the on-screen prompts, which typically involve zeroing the empty scale and then placing the known test weight(s) on the platform to set the span.

Calibration is the process of adjusting your scale to match a known standard. Think of it as tuning an instrument. As a manufacturer, we see a lot of problems that are simply due to poor or infrequent calibration. While we recommend professional calibration every year, you can perform it yourself if you have the right equipment.
The Basic Calibration Process
The exact steps depend on your scale's indicator, so always have your manual handy. However, the general principle is the same.
- Enter Calibration Mode: This usually requires pressing a specific button or sequence of keys. The display will change to indicate it's in calibration mode6.
- Establish the Zero Point: The scale will prompt you to ensure the platform is empty. It then records this as the zero point.
- Set the Span: The scale will then ask you to place a specific amount of weight on the platform. This is where you use your certified test weights. For example, it might ask for 100 kg. You place the 100 kg test weight on the scale.
- Confirm and Exit: Once the scale stabilizes, you confirm the weight. The scale saves the new calibration, and you can exit the mode.
What if Calibration Fails?
If the scale still isn't accurate after calibration, or if it won't complete the process, there might be a deeper issue.
| Possible Reason for Failure | What to Do |
|---|---|
| Unstable Environment | Vibrations or air drafts are interfering. Try calibrating at a quieter time or location. |
| Incorrect Test Weights | The weights you used do not match what the scale requested. Double-check the procedure. |
| Damaged Sensor | A load cell may be faulty. If recalibration fails repeatedly, you likely need a repair. |
Regular calibration is the best preventive maintenance you can do. It ensures accuracy and helps you spot potential hardware problems early.
Conclusion
By checking the basics, resetting, and calibrating correctly, you can solve most floor scale issues. For persistent problems, professional support is your best and safest option.
-
Learn how to inspect cables to ensure your scale is receiving proper power and functioning. ↩
-
The mechanical structure affects accuracy; learn how to maintain it. ↩
-
Understanding error codes can help you troubleshoot issues quickly. ↩
-
A power cycle can resolve many issues; find out how to perform it correctly. ↩
-
Learn the steps for a factory reset and when to use this method. ↩
-
Entering calibration mode is crucial for accuracy; discover how to do it. ↩


Comments (0)