Relying on traditional strain gauges for precision? These devices can drift over time, causing costly errors. Knowing their limits is key to making a smarter choice for your operations.
The main limitation of a strain gauge is its sensitivity to environmental changes. Temperature, humidity, and physical stress can cause the gauge to drift, leading to inaccurate readings. This makes them less reliable for high-precision tasks or in harsh industrial environments over long periods.

For 19 years, I've seen countless weighing systems in action. Strain gauges have been the backbone of our industry for a long time. They are simple and effective for many tasks. But as technology moves forward, their physical nature becomes a clear bottleneck. We need to look closer at these issues, especially as we move toward smarter, more connected factories. A lot of our clients, especially software vendors, ask us about the digital side of things. Let's start by looking at digital gauges1 and their own set of challenges.
What is a disadvantage of digital gauges?
Thinking a digital gauge is the perfect upgrade? They can introduce new problems like complex integrations and software glitches that can stop your entire production line just as quickly.
A major disadvantage of digital gauges is their complexity and potential for software-related failures. While they offer higher precision, they require careful integration, are susceptible to electronic noise, and can be more difficult to troubleshoot than their simple analog counterparts without proper technical support.

In my experience, many clients, especially those from a software background, assume "digital" means easy integration. The reality can be different.
The Integration Hurdle
A digital gauge isn't just a component; it's a node in your network. It needs to speak the same language as your existing systems. We've seen projects delayed because of mismatched data protocols2 or poorly documented APIs. This is a huge concern for purchasing managers who need a smooth rollout. You're not just buying a piece of hardware; you're buying into an ecosystem. It’s critical to partner with a supplier who understands both hardware and software to ensure your solution works from day one.
The Software Trust Factor
Then there's the software itself. Is it stable? Is it secure? A bug in the firmware can be much harder to diagnose than a physical defect. As a software vendor yourself, you know how critical stable code is. You need a partner who provides robust, tested software and responsive technical support3. This is why our team includes experts in IoT and automation, ensuring our digital solutions are reliable and secure. It's about building a complete and trustworthy system, not just selling a scale.
What are the sources of error in a strain gauge?
You trust your strain gauge readings completely. But hidden environmental factors are constantly introducing small, invisible errors that can compromise your data and cost you money over time.
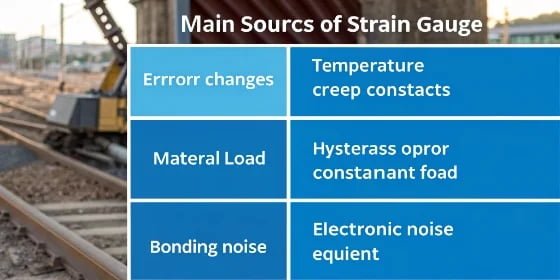
The main sources of error in a strain gauge include temperature changes, which affect the metal's resistance (thermal output). Other sources are material creep under constant load, hysteresis (not returning to zero), poor bonding, and electronic noise from nearby equipment, all contributing to inaccurate measurements.

Understanding where errors come from is critical. As I mentioned earlier, a strain gauge works by detecting physical changes, and that's where the problems start. I've worked in quality control, and testing for these issues is a huge part of our process before any product ships. Let's break down the common culprits in a simple table.
A Breakdown of Common Errors
| Error Source | Description | My Experience |
|---|---|---|
| Temperature Shift | The gauge's electrical resistance changes with temperature, creating a false strain reading. This is the most common issue we see. | We pre-test all units in temperature chambers to ensure they perform within strict specifications, especially for clients in extreme climates. |
| Creep | When a load is applied for a long time, the gauge material slowly deforms, and the reading drifts. | This is critical for silo or tank weighing. We select specific alloys and designs to minimize creep for long-term stability. |
| Hysteresis | The gauge doesn't return to the exact same zero point after a load is applied and removed. | Every scale we build is tested for return-to-zero accuracy. This ensures you're not carrying over errors from one measurement to the next. |
These aren't just theoretical problems. They are real-world factors that we, as a manufacturer, have to solve. It’s why our quality inspection4 department is so thorough—to provide a product that you can truly rely on.
What are the limitations of a pressure gauge?
You rely on pressure gauges for critical process control. But like strain gauges, they suffer from wear and environmental effects, leading to false readings that can cause costly failures.
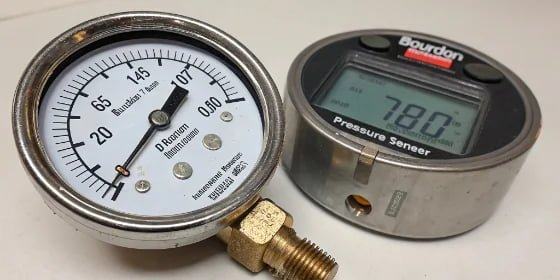
Limitations of pressure gauges include mechanical wear on moving parts (like in Bourdon tubes), sensitivity to vibration and temperature, and drift over time. For those using strain-gauge-based pressure sensors, they inherit all the same limitations of temperature sensitivity and material creep, affecting their long-term reliability.

Many people think of pressure and weight (force) as separate things, but in industrial settings, they are often linked. We frequently help clients who use pressure to measure the contents of a tank, for example. Understanding the limits of these devices is just as important.
Mechanical vs. Electronic
Traditional mechanical pressure gauges5, like the ones with a dial and needle, have moving parts. These parts wear out over time. They are also very sensitive to vibration, which can make the needle jump around or cause permanent damage. They are very simple to install, but they are not very accurate or durable enough for modern automated systems where data is key.
The Strain Gauge Connection
This is where things get interesting. Many modern electronic pressure sensors actually have a strain gauge inside. They use a flexible diaphragm that bends under pressure. A strain gauge attached to this diaphragm measures how much it bends, which is then converted into a pressure reading. This means they inherit all the same limitations we've already discussed: temperature sensitivity, creep, and hysteresis6. So, when you're troubleshooting a pressure system, you might actually be dealing with a strain gauge problem.
What is the uncertainty of strain gauges?
You need absolute confidence in your data. But every strain gauge has a built-in level of uncertainty. This "margin of error" can directly impact your product quality and compliance.
The uncertainty of a strain gauge is the total possible error from all sources, expressed as a percentage of the reading (e.g., ±0.1%). It combines errors from temperature, non-linearity, hysteresis, and creep. This value defines the confidence range for any given measurement you take.

"Uncertainty" sounds academic, but for a technical director or purchasing manager, it translates directly to business risk. It's the quantifiable doubt in every number your scale produces.
Calculating the Real Cost
Let's imagine you are using a scale for batching expensive ingredients. If the total uncertainty of your strain gauge system is ±0.2%, and you're measuring a 100 kg batch, your actual amount could be anywhere from 99.8 kg to 100.2 kg. This small variation, multiplied over thousands of batches a year, results in significant material loss or inconsistent product quality. For our clients in software, think of it as the error rate in your data stream. You need that rate to be as low as possible.
How We Minimize Uncertainty
At Weigherps, minimizing uncertainty is our core job. It's why we have an entire quality inspection department. We reduce uncertainty by using high-quality-certified components, applying them correctly, and performing multi-point calibration7. Every product we make undergoes comprehensive software, weight, and battery testing before it ever leaves our factory. We provide you with a system you can trust, with a known, minimal level of uncertainty to protect your bottom line.
Conclusion
Strain gauges have clear limitations due to temperature, drift, and stress. Acknowledging these weaknesses is the first step toward choosing a truly reliable and accurate weighing solution for your business.
- Discover the complexities of digital gauges to avoid potential pitfalls in your integration. ↩
- Explore data protocols to ensure compatibility and efficiency in your digital systems. ↩
- Reliable technical support is essential for maintaining the performance of your digital gauges. ↩
- Explore the importance of quality inspection to ensure high-performance strain gauges. ↩
- Explore the limitations of pressure gauges to make informed decisions for your processes. ↩
- Understanding hysteresis can help you select better strain gauge solutions for your needs. ↩
- Learn about multi-point calibration to enhance the accuracy of your strain gauge systems. ↩


Comments (0)