Getting incorrect weights costs your business money and damages your reputation. You need data you can trust, but inconsistent or wrong readings leave you uncertain about your quality control.
Accuracy is how close a measurement is to the true, correct value. Precision is how close multiple measurements are to each other. A scale can be highly precise without being accurate, consistently showing the same incorrect weight.

You might hear the terms "accurate" and "precise" used as if they mean the same thing. In my 18 years of manufacturing industrial scales1, I can tell you this is a common and costly mistake. The difference between them is not just a detail for engineers; it is critical for your business's bottom line. Understanding this distinction ensures you choose the right equipment and trust the data it provides. Let's explore why this matters so much for your operations.
How do accuracy and precision differ in measurement?
Your measurements seem consistent, which feels good. But what if they are consistently wrong? This hidden error could be causing massive downstream problems in your production or research.
Accuracy reflects correctness, measuring how close you are to the real value. Precision reflects consistency, showing how repeatable your measurements are. Think of accuracy as getting the right answer and precision as getting the same answer every time.
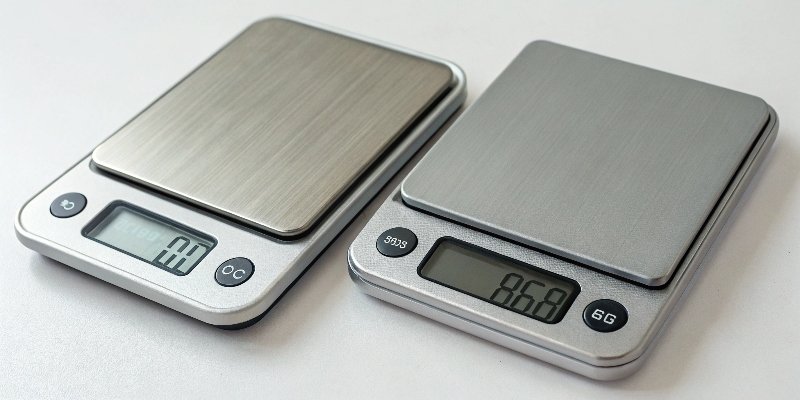
To really get to the bottom of this, we need to treat them as two separate ideas. I've seen customers struggle with this, so let's break it down simply. One concept deals with being right, and the other deals with being repeatable.
Understanding Accuracy
Accuracy2 is all about truth. It’s a measure of how close your scale's reading is to the object's actual, true weight. If you place a certified 100-gram weight on a scale and it reads 100.01 grams, that scale is very accurate. If it reads 105 grams, it is inaccurate. Accuracy is most often affected by what we call systematic errors. This kind of error is consistent and repeatable, like a scale that hasn't been calibrated correctly. It will always be off by a certain amount. At Weigherps, we ensure our scales meet international standards like CE, and our comprehensive quality checks before shipment guarantee they are accurate right out of the box.
Understanding Precision
Precision3 is about consistency. It has nothing to do with the true value. It only describes how well a scale can produce the same result over and over again. If you weigh the same 100-gram object three times and get readings of 98.1g, 98.2g, and 98.1g, your scale is very precise. The readings are tightly grouped. However, notice they are not accurate. Precision is affected by random errors—small, unpredictable changes from things like air currents, vibration, or electronic noise. A well-designed scale, like the ones we've perfected over the years, is built to be stable and minimize these random fluctuations, delivering high precision.
What are the key distinctions between accuracy and precision?
The concepts can still feel a bit abstract when explained with just words. Confusing them can lead you to buy the wrong equipment or make decisions based on flawed data.
The best way to see the difference is with a target. Accuracy is hitting the bullseye. Precision is grouping your shots tightly together, even if that group isn't on the bullseye. You ideally want both.

The target analogy is something I use all the time because it makes the difference immediately clear. It perfectly visualizes the relationship between the two terms and shows why having one without the other can be a problem.
The Target Analogy Explained
Imagine you are throwing darts.
- High Accuracy, High Precision: Your darts are all grouped tightly together right in the center of the bullseye. This is the goal. Your measurements are both correct and repeatable.
- High Precision, Low Accuracy: Your darts are all grouped tightly together, but they are in the top-left corner of the board, far from the bullseye. Your scale gives you the same reading every time, but that reading is wrong. This often points to a calibration issue.
- High Accuracy, Low Precision: Your darts are scattered all around the bullseye. On average, you are centered on the target, but any single throw is unreliable. This happens when a scale is affected by random errors4 like vibrations.
- Low Accuracy, Low Precision: Your darts are spread all over the board randomly. This is the worst-case scenario. The measurements are neither correct nor repeatable.
A Side-by-Side Comparison
This table puts the key differences in a structured format, which many of our clients find helpful for making purchasing decisions. It helps them define exactly what they need from a weighing system.
| Feature | Accuracy | Precision |
|---|---|---|
| Core Concept | Closeness to true value (Correctness) | Closeness of measurements to each other (Consistency) |
| Ideal State | Measured value equals the true value. | All repeated measurements are nearly identical. |
| Error Type | Systematic Error (e.g., poor calibration) | Random Error (e.g., environment, vibration) |
| Example | A scale reads 100g for a 100g standard weight. | A scale reads 95.1g every time for a 100g weight. |
A scale can be manufactured with high precision but become inaccurate over time if not maintained. This is why you cannot assume one from the other.
Why are accuracy and precision important in scientific measurements?
You're investing in new equipment for your lab or production line. Making a bad choice based on a misunderstanding could ruin entire experiments or product batches, wasting significant time and money.
In science and industry, accuracy ensures your results are valid and your products meet specifications. Precision ensures your processes are reliable and repeatable. Lacking either can lead to failed experiments, rejected parts, and huge financial losses.

In any field where measurements are critical, from pharmaceutical labs to automotive manufacturing, the roles of accuracy and precision are non-negotiable. They are the foundation of quality and reliability.
In the Laboratory
When my clients are software vendors working with smart devices, they often serve industries like biotech or chemical analysis. In these fields, formulas are everything. If you are creating a chemical compound, you need accuracy to ensure you use the correct amount of each ingredient. A small error could change the substance entirely. At the same time, you need precision to prove that your results are repeatable and not just a fluke. A single, seemingly accurate reading is useless if you can't get it again. Scientific discovery depends on results that are both true (accurate) and reproducible (precise). This is why lab-grade scales must deliver on both fronts.
On the Production Line
In industrial manufacturing, the stakes are just as high. Imagine a company making engine parts for a car. The parts must meet exact design specifications to fit and function correctly. That requires accuracy. If a scale is inaccurate, the parts could be slightly too heavy or too light, leading to performance issues or failure. Precision is also vital. To run an efficient production line, every single part must be virtually identical. High precision ensures minimal variation between units, reducing the scrap rate and guaranteeing that every part that comes off the line is a good one. As a manufacturer of industrial scales, we design our systems to give clients the control they need to achieve this level of quality consistently.
How can you improve both accuracy and precision in experiments?
Your measurements are not as reliable as you need them to be. This uncertainty is creating expensive errors and holding back your progress, which is a problem we help our clients solve every day.
Improve accuracy through regular calibration using certified standard weights. Improve precision by controlling the environment—like reducing drafts and vibrations—and by using high-quality, stable equipment. Averaging multiple measurements also increases confidence.

The good news is that you have a high degree of control over both accuracy and precision. It comes down to two things: proper procedure and the right equipment.
Boosting Accuracy
The single most important activity for ensuring accuracy is calibration. A scale's accuracy can drift over time due to normal wear, temperature changes, or physical movement. Calibration is the process of adjusting the scale to match a known standard. I always tell our customers to establish a regular calibration schedule using certified, traceable weights. This resets the scale's accuracy and corrects for any systematic errors5 that have developed. Our scales are designed for easy calibration, and our after-sales support team can always provide guidance. This simple maintenance step is the key to trustworthy, accurate data.
Enhancing Precision
Improving precision is all about controlling variables and reducing random error. Here are the most effective steps:
- Control the Environment: Place your scale on a stable, level surface away from vibrations, drafts from air conditioning, or rapid temperature changes. For highly sensitive scales, a draft shield6 is essential.
- Use Consistent Procedures: Always allow the scale to warm up before use. Place the item being weighed in the center of the weighing pan every time.
- Invest in Quality Equipment: A well-built scale is more resilient to environmental interference. With 18 years of OEM/ODM experience, we at Weigherps focus on building robust weighing systems with high-quality sensors7 and internal components that deliver stable, repeatable results. A cheap scale will always be more susceptible to random errors, making precision difficult to achieve.
Finally, taking several measurements and calculating the average is a great practice. It doesn't fix an inaccurate scale, but if your scale is precise, averaging will give you a result that is closer to the true value.
Conclusion
Understanding the difference between accuracy and precision is vital for collecting reliable data. Accuracy is correctness, while precision is consistency. Demand both from your weighing equipment for optimal results.
-
Discover top industrial scales that ensure both accuracy and precision for your operations. ↩
-
Understanding accuracy is crucial for ensuring your measurements are correct and reliable. ↩
-
Precision is key for repeatability in measurements, ensuring consistent results in your processes. ↩
-
Understanding random errors can help you enhance the precision of your measurements. ↩
-
Learn about systematic errors to improve the accuracy of your measurements and avoid costly mistakes. ↩
-
A draft shield can enhance measurement precision by minimizing environmental interference. ↩
-
High-quality sensors are essential for achieving both accuracy and precision in measurements. ↩



Comments (0)